How to Install and Configure Kubernetes on Ubuntu ?
Kubernetes is open-source software that helps to solve problems related to container-based software automation. It is like a container based system, which helps to distribute out the work that needs to be executed while testing software. Kubernetes are portable in nature. That is why it is widely used throughout the globe. Basically, it helps the deployment of any new build software for any new build software, there are certain requirements that need to be filled out by them. This work is done by the software testers. But the work of deploying a software is not a easy enough. For that purpose, testers take the help of Kubernetes. It breaks the software into small pieces, & after that, testing will be easier for that simple pieces. In this way, the overall process is completed.
Features of Kubernetes
-
Kubernetes is extensive in nature. That means it can be used for other purposes of software development.
-
Kubernetes helps to configure the software as well. As well as helping with the automation of the software.
-
Kubernetes dependencies are highly useful. Kubernetes tools transporter and services are available, that help to cut down the workload for deploying any software.
Installation & Configuration of Kubernetes in Linux
Here we have to install some prerequisites for installing Kubernetes. These installations have to be done along with the installation of Kubernetes. These installations are part of its configuration.
Step 1
At first, we have to open the terminal Linux. Then we have to write the following command. This will help to install a transporter. The transporter is a component that is needed to install Kubernetes in the machine. Wait till the process is completed.
sudo apt-get install -y apt-transport-https

Step 2
Now, it is time to install Docker. It is a necessary item that coordinates with the Kubernetes. If docker was installed previously in the machine, then there is no problem with the following command. The terminal will simply skip this command & move forward. But if the Docker is not present in the machine, then it will take some time for its installation.
sudo apt install docker.io

Step 3
Now after successful installing Docker on the machine, we have to start & enable it. Otherwise, it will not provide permission to install Kubernetes on the machine. We have to execute the below two commands.
sudo systemctl start docker
sudo systemctl enable docker

Note
If the docker is previously installed in the machine, there is no need to execute the Step 2 & Step 3. If Docker is installed in the machine & those steps are executed, then it will not create any fatal problem with the installation. But better prefer not to execute those steps.
Step 4
Now after successfully starting the Docker, it is time to install Curl in Linux. As Curl will help to run many dependencies with the Kubernetes. We have to run the following command this will install the Curl in the machine. Wait till the installation is completed.
sudo apt-get install curl

Note
There may be users who find that installing of Curl along with Kubernetes is a waste of time. But it is a necessary one. Without Curl, installation of Kubernete will complete. But in future when they use Kubernetes they start malfunctioning. As Curl helps to auto-update Kubernetes. Without Curl Kubernetes can’t update to latest version. As a result, it will gradually stop working.
Step 5
Now it is time to install Kubernetes. Kubernetes is basically a combination of four dependencies. They are Kubelet, Kubeadm Kubectl, and Kubernetes. These dependencies are a combination of many other dependencies. We have to install these main dependencies. For that purpose, we have to execute the below-mentioned below-mentioned command. This will help to install these dependencies.
sudo apt-get install -y kubelet kubeadm kubectl kubernetes-cni

Step 6
We have to wait for some time. As the installation of Kubernetes will take some time. The consumption of time may depend upon the speed & configuration of the machine.

Step 7
Now, we have installed Kubernetes. Along with this, we have configured the necessary parts of it. Now, it is time to configure & start Kubernetes in the machine. For that purpose, we have to run the following command. This command will initialize the Kubernetes in the machine. Wait till the process is completed.
sudo kubeadm init

Step 8
After completion of the above state, there will be a message displayed. That will state that the Control Panel of the Kubernetes has initialized. So, the Kubernetes has started working. Hence, the installation & configuration of Kubernetes is successfully completed.

Setting Up Kubernetes on Minikube: A Step-by-Step Guide for Ubuntu Users
Step 1: Update System and Install Required Packages
Ensure your system is up to date and update, upgrade the packages using the below commands. Refer the below images for your reference.
sudo apt-get update -y
sudo apt-get upgrade -y


Ensure your system is required necessary packages and download the necessary packages using the below commands. Refer the below images for your reference to install the necessary packaged.
sudo apt-get install curl
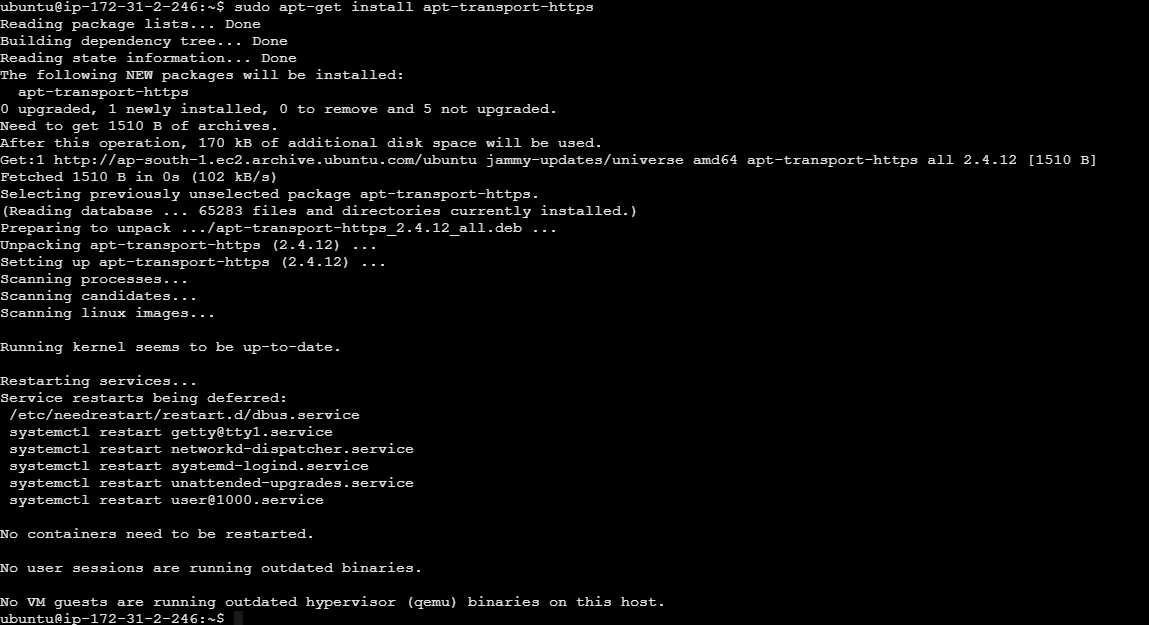
sudo apt-get install apt-transport-https


Step 2: Install VirtualBox Hypervisor
Install the VirtualBox hypervisor, required for running Minikube. Here is the command to download the virtual box in the machine.
sudo apt install virtualbox virtualbox-ext-pack
-
sudo: This command stands for “superuser do” and is used to execute commands with elevated privileges. It allows regular users to perform administrative tasks.
-
apt: This is the package manager for Debian-based Linux distributions like Ubuntu. It is used to install, remove, and manage software packages.
-
install: This is the action that apt will perform. It tells apt to install the specified packages.
-
virtualbox: This is the name of the package to be installed. VirtualBox is a powerful, cross-platform virtualization software that allows you to create and run virtual machines on your computer.
-
virtualbox-ext-pack: This is an optional package that contains additional features and extensions for VirtualBox, such as support for USB 2.0 and 3.0 devices, VirtualBox Remote Desktop Protocol (VRDP) support, and more.

Step 3: Install Minikube
Download and install Minikube, a tool for running Kubernetes clusters locally. We need to install the minikube later steps here is the image for your reference.
wget https://storage.googleapis.com/minikube/releases/latest/minikube-linux-amd64
This command uses wget, a command-line utility for downloading files from the internet, to fetch the latest Minikube binary specifically built for Linux with the AMD64 architecture. The URL https://storage.googleapis.com/minikube/releases/latest/minikube-linux-amd64 points to the latest Minikube release hosted on Google Cloud Storage. Once downloaded, this binary can be executed to install Minikube on a Linux system with an AMD64 processor architecture.

Copy the minikube file into /usr/local/bin. Below are the commands to copy the minikube and provide the sufficient permissions to the minikube file.
sudo cp minikube-linux-amd64 /usr/local/bin/minikube
sudo chmod 755 /usr/local/bin/minikube

Check the minikube version. Here is the command to check the minikube version. Refer the below image for your reference.
minikube version

Step 4: Install Kubectl
Install Kubectl, the command-line tool for interacting with Kubernetes clusters:
curl -LO https://storage.googleapis.com/kubernetes-release/release/`curl -s https://storage.googleapis.com/kubernetes-release/release/stable.txt`/bin/linux/amd64/kubectl
-
curl -s https://storage.googleapis.com/kubernetes-release/release/stable.txt: This inner curl command retrieves the latest stable version of Kubernetes from Google Cloud Storage by querying the stable.txt file, which contains the version number.
-
“: This part of the command is enclosed in backticks, which allows the output of the inner curl command (i.e., the Kubernetes version number) to be used as input for the outer curl command.
-
curl -LO: This part of the command initiates a new curl request to download the kubectl binary.
- -L option tells curl to follow any redirects.
- -O option instructs curl to save the downloaded file with the same name as the remote file.
-
https://storage.googleapis.com/kubernetes-release/release/
/bin/linux/amd64/kubectl : This is the URL where the kubectl binary for Linux on AMD64 architecture is located. Theplaceholder is replaced with the Kubernetes version obtained from the inner curl command.

Move the kubectl file into /usr/local/bin for installation.
chmod +x ./kubectl
sudo mv ./kubectl /usr/local/bin/kubectl

Check the kubectl version in the json mode.
kubectl version -o json

Step 5: Start Minikube
Start Minikube to create and manage Kubernetes clusters locally.
minikube start

Managing Kubernetes with Minikube
Here are some common commands to manage your Minikube Kubernetes cluster:
Common Minikube Commands
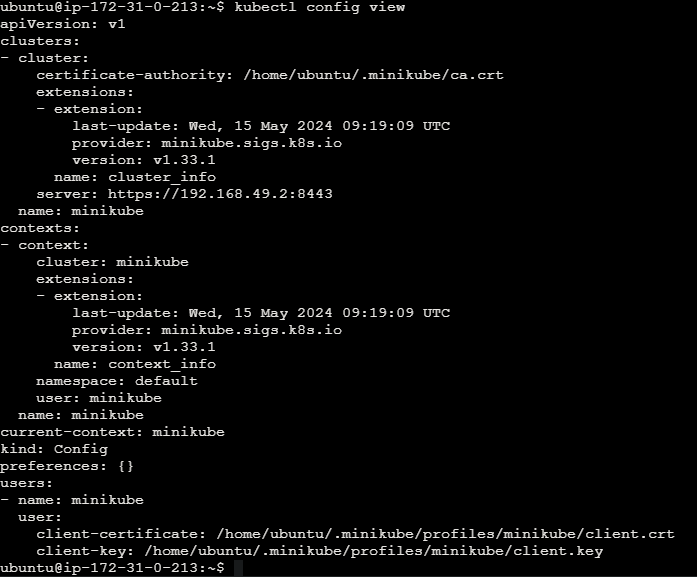
View Kubernetes configuration of the minikube cluster.
kubectl config view

Access Minikube Dashboard
View cluster information by using the below command.
kubectl cluster-info

View nodes in the cluster of the minikube.
kubectl get nodes

View pods in the cluster of the minikube.
kubectl get pod

Check Minikube status on the minikube cluster.
minikube status

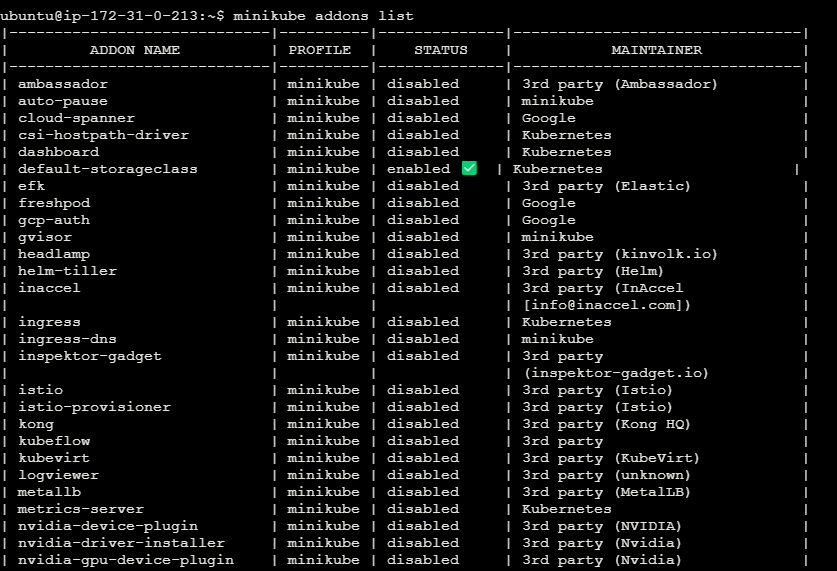
List Minikube addons by using the below command.
minikube addons list

Access Minikube Dashboard of the minikube cluster.
minikube dashboard

Access Minikube Dashboard URL. For your reference refer the below image.
minikube dashboard --url
